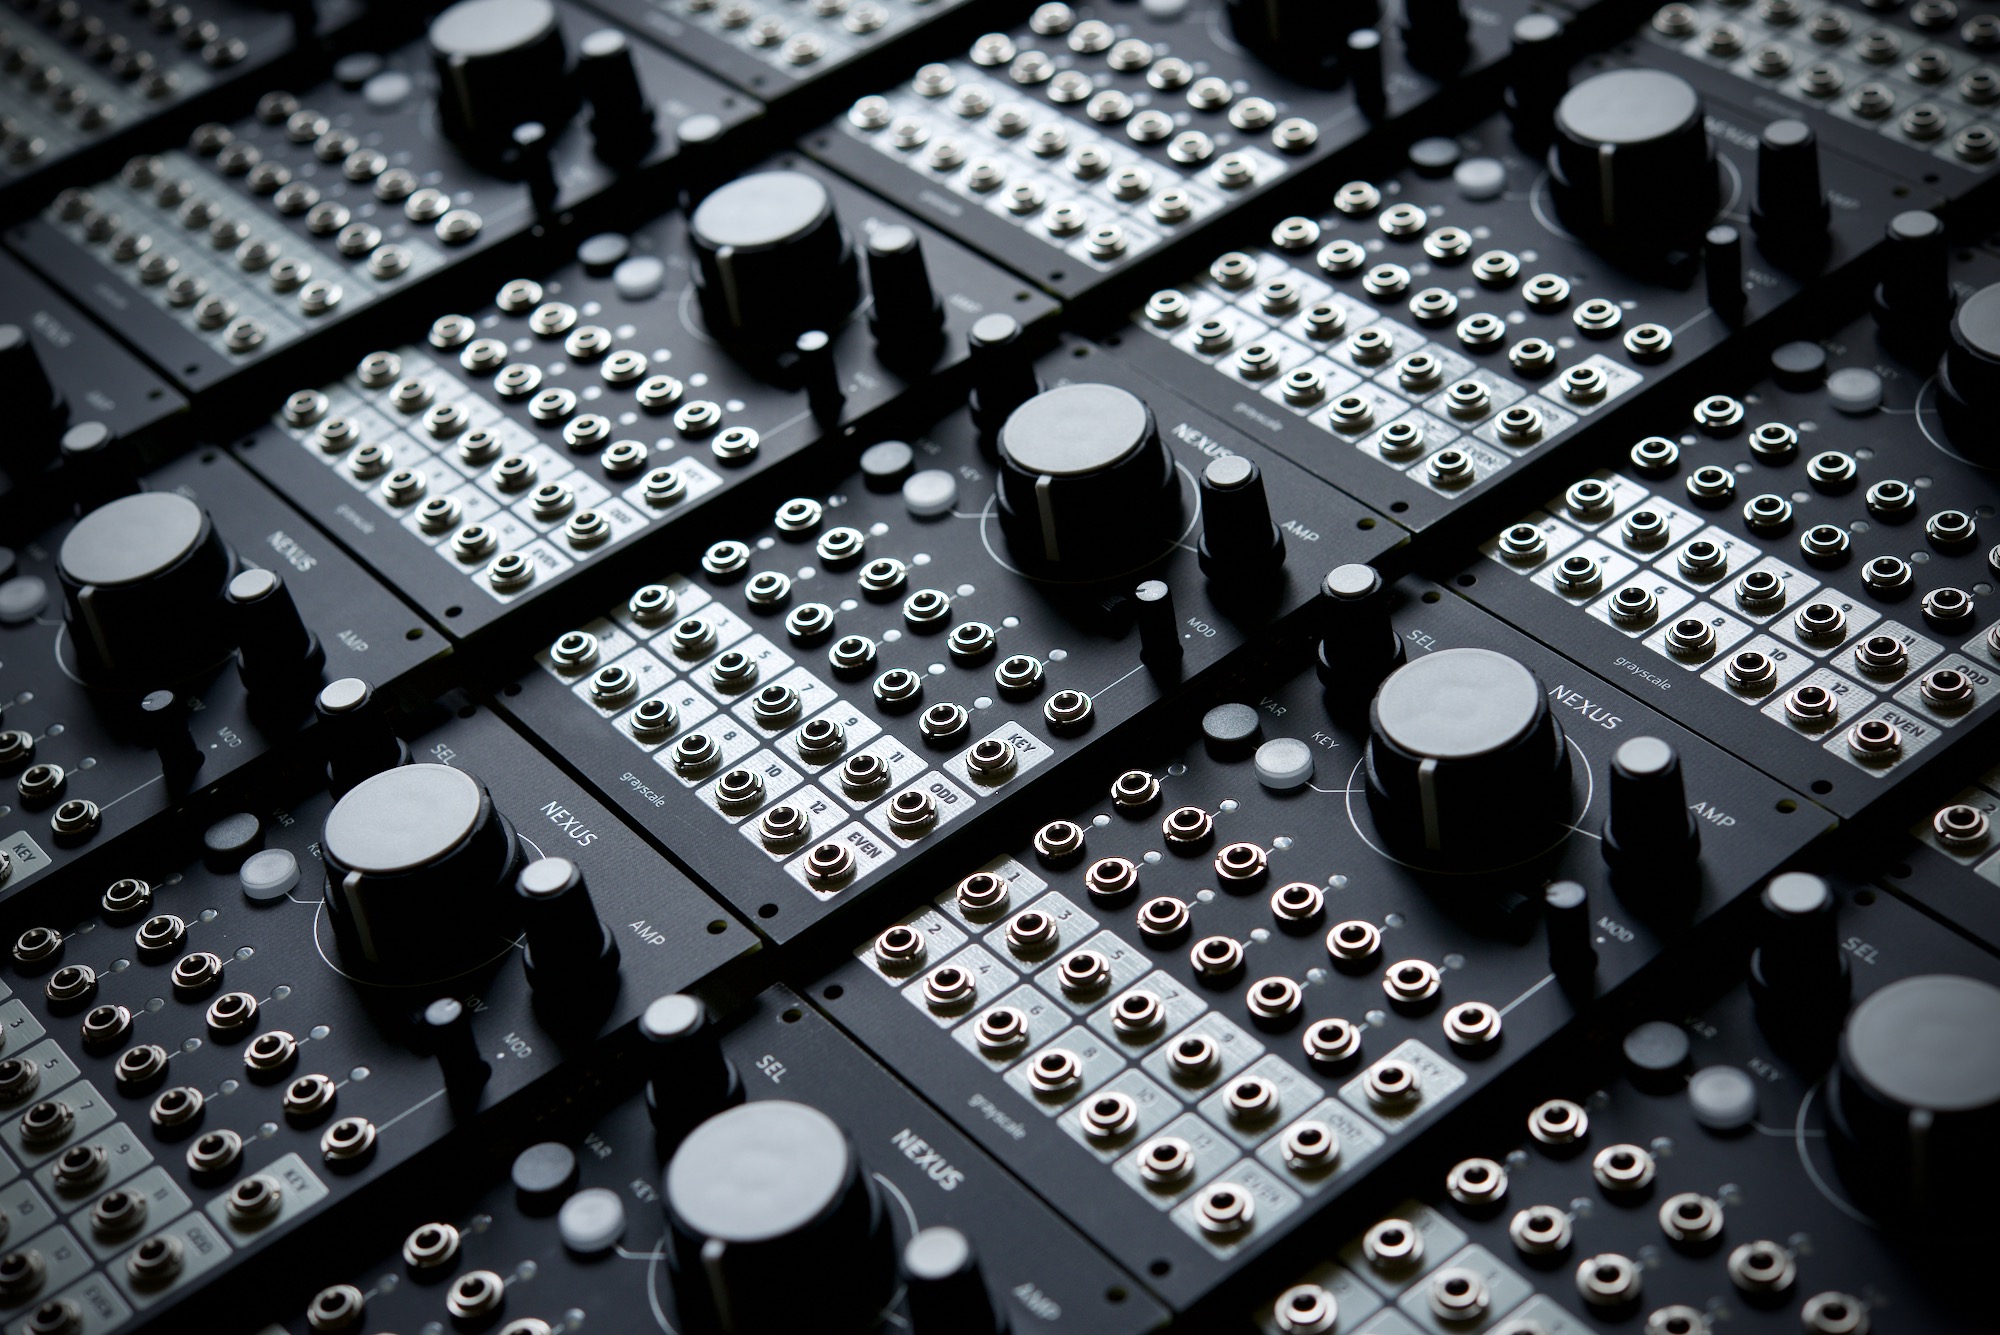
NEXUS
Advanced Macro Controller
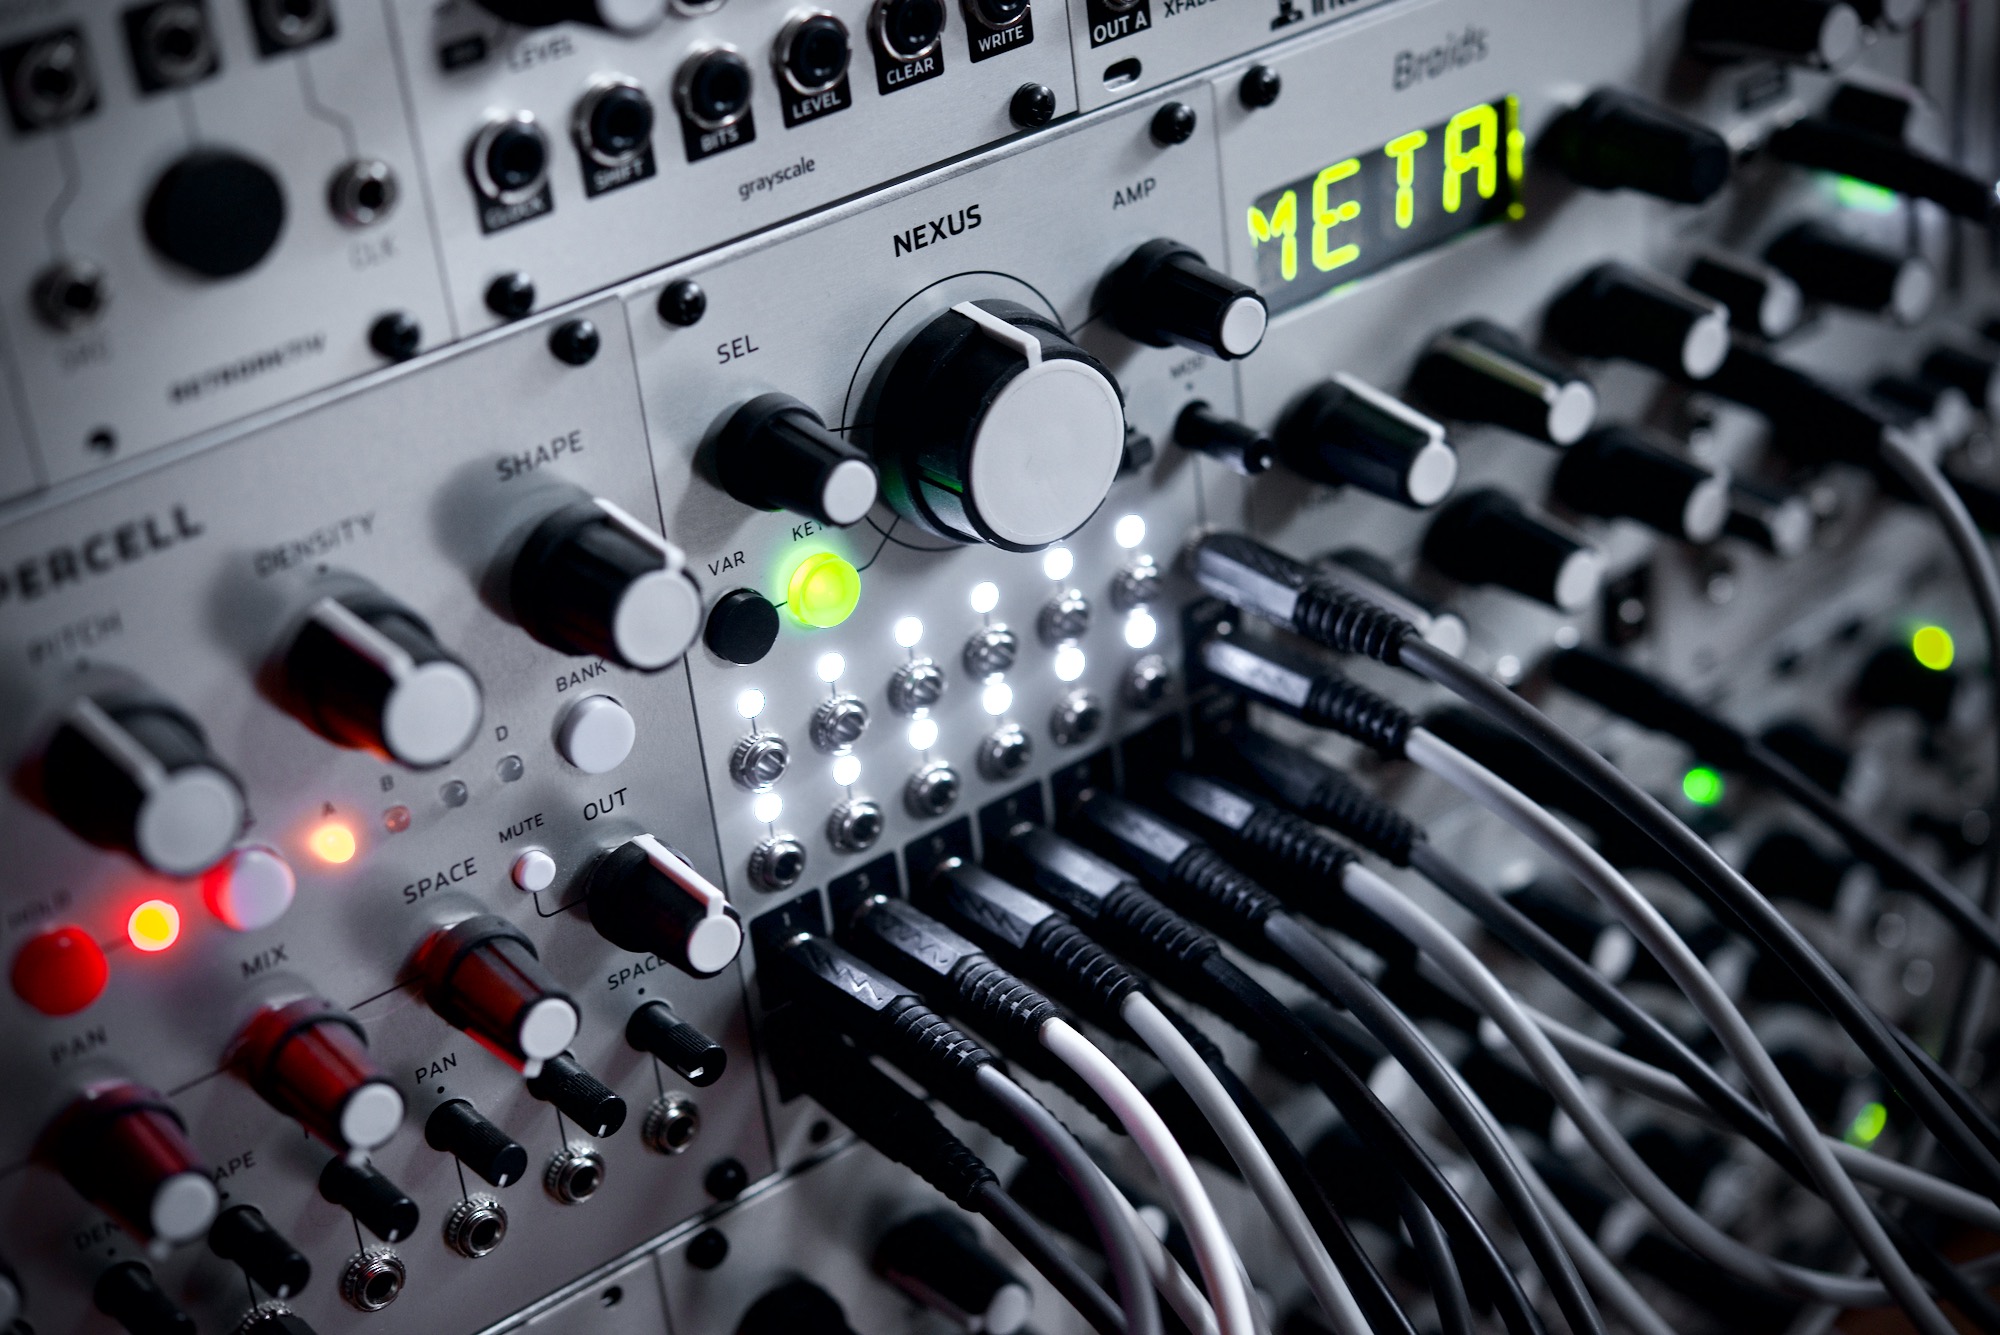
Nexus: a 12-channel macro controller
Nexus brings the unique keyframing concept of Frames back to the Eurorack format.
While retaining the same 18hp width as the original, Nexus provides eight more VCA channels, a faster workflow, an improved hardware spec, and numerous new features intended to provide an unprecedented level of control over complex modular patches.
Keyframing is a technique borrowed from digital animation. A keyframe marks the VCA levels of 12 different channels at a single moment in time. Up to 32 keyframes can be stored on a timeline, and the timeline position is controlled by a single large knob. When the timeline position is changed and levels vary between keyframes on the same channel, various interpolation algorithms may be applied to create smooth transitions between different levels. The timeline position can be controlled manually by turning the large knob, modulated by an external control voltage, or sequenced with a trigger source.

The open-ended nature of the keyframing concept makes Nexus incredibly versatile. With the ability to both process external signals and generate control voltages, Nexus can be used as a mixer, sequencer, LFO, envelope generator, attenuator, clock divider, sequential switch, stereo or quadraphonic panner, multi-channel crossfader, and more. Many of these functions can be patched simultaneously, providing extensive serial or parallel processing of audio and control voltages. This functionality can be further extended with new randomization options, including the ability to randomize keyframe levels and randomly step through keyframes using an external trigger source.
Stereo operation is simplified with individual mix outputs for each row (representing separate left and right mixes) and internal mono-to-stereo normalizations. The redesigned user interface allows for editing of multiple channels simultaneously, copying keyframes to new timeline positions, and saving up to 12 user presets. The core circuitry has also been upgraded to eliminate audio bleed and provide precise output level calibration. The VCAs are digitally controlled but the signal path remains entirely analog.
Order Form
Nexus is now available. Orders are shipped worldwide via USPS. Shipping costs will be calculated during checkout based on your location. Payment is processed via Paypal.
Nexus vs Frames
| Attribute | Nexus | Frames |
|---|---|---|
| Width | 18 hp | 18 hp |
| VCA Channels | 12 | 4 |
| User Presets | 12 | 1 |
| Autosave | Yes | No |
| Stereo I/O | Yes | No |
| Multi-Channel Editing | Yes | No |
| Level Randomization | Yes | No |
| Clickless Sequencing | Yes | No |
| Random Sequencing | Yes | No |
| Copy/Paste Keyframes | Yes | No |
| VCA Calibration | Yes | No |
| Module Depth | 25 mm | 28 mm |
| +12V current draw | 148 mA | 90 mA |
| -12V current draw | 77 mA | 30 mA |
What's missing from Nexus? The bright RGB LED and translucent knob. The "bounce" interpolation curve. The hidden LFO mode. The 5V/10V jumper. The 1:4 ALL input was replaced with six 1:2 stereo normalization pairs. The ADD/DEL switches have been consolidated into a single KEY switch. All other functionality from Frames remains intact or has been expanded in some way.
Operational Theory
Nexus is based around the concept of keyframes. Keyframes are simply snapshots which represent the levels of the 12 VCAs at arbitrary points in time. Up to 32 keyframes can be created, forming a matrix of up to 384 different VCA levels (12 channels x 32 keyframes).
The diagram below shows 9 keyframes marked as T0-T8, along with a representation of how Nexus interpolates between different VCA levels over time. Four different smoothing curves can be applied, along with two non-interpolated options for sharp transitions.

Timeline knob. Turning the big knob scrolls through the timeline, controlling the rate of transition between keyframes. Think of the timeline as a 12-track tape, and the modulation rate as the speed of the motor in the tape machine. The playback speed can be controlled by the knob or the MOD input, which has a +/-5V range and a bipolar attenuator. When using external modulation, the 0V baseline is equal to the physical position of the knob. If you want to modulate through the entire timeline, turn the knob all the way to the left or right.
Channel selection (SEL). The detented SEL encoder controls which channels may be edited. Turn the knob to select different channels. You can also press SEL to cycle through four different selection scopes (single, columns, rows, or all) allowing you to simultaneously edit multiple channels. When the selection scope is changed, the channel LEDs will blink to indicate the scope.
Level adjustment (AMP). The smooth AMP encoder adjusts VCA levels for all channels within the selection scope. Turn the knob slowly to make small adjustments or turn it more quickly to rapidly traverse the full range. You can also turn the AMP knob while it's being pressed to make very fine adjustments, useful for fine-tuning the pitch of a VCO for example. You may also press the AMP knob to toggle the selected VCAs between their minimum and maximum values. This allows you to quickly mute a VCA or open it completely without needing to turn the AMP knob. There's also a quick way to flip the levels of all channels within the selection scope. With the big knob pointing to a keyframe (KEY LED is green), press VAR. All channel levels within the selection scope will be flipped. Press VAR again to revert this change and flip the channel levels back to where they were previously.
VAR switch. Performs various functions, often in combination with pressing or turning other controls. See the other sections for documentation of all VAR functions.
10V switch. In the upper position, enables an internal 10V DC offset which is normalized to any unpatched inputs. This allows Nexus to generate CVs by internally modulating the channel VCAs with the DC offset. In the lower position, the DC offset is disabled.
Channel I/O. There are 12 channel inputs with an associated LED indicating the VCA level for each channel. Below that are the 12 channel outputs which mirror the inputs and their post-VCA processing. The top row of inputs (odd numbers) is normalized to the bottom row of inputs (even numbers) so that mono signals can be easily converted to stereo. Or you can patch existing stereo signals into the odd/even input pairs.
Add/delete keyframes (KEY). One of the "key" concepts to understand is that VCA adjustments can only occur on keyframes. To add a keyframe, turn the big knob to any location along the timeline. If the KEY LED is off, press the KEY switch to create a new keyframe. At least two keyframes are required—otherwise there is nothing to interpolate or sequence—so turn the knob to a second location and add another keyframe. Now you can set up the individual VCA levels for each channel. To delete a keyframe, point the knob to an existing keyframe (indicated by a green KEY LED). Press the KEY switch and the KEY LED will turn off, indicating that the keyframe has been deleted.
KEY output. This output generates a 10ms trigger whenever a keyframe becomes active, like the FRAME output on Frames but with a different label.
ODD/EVEN mix outputs. There are separate mix outputs for each row, labeled ODD (odd-numbered outputs) and EVEN (even-numbered outputs). In a stereo patching paradigm these could also be considered LEFT and RIGHT outputs. Patching a cable into any of the individually-numbered outputs will subtract that channel from the mix output on that row. You can also patch the mix outputs back into any unused pair of inputs to control the final mix outputs, then patch the direct outputs from those inputs to your external mixer, headphone amp, etc.

Interpolation types. Each channel uses one of six interpolation types during transitions between keyframes. Press the VAR switch and then turn SEL to choose the interpolation type for all channels within the selection scope. The KEY LED will turn orange during this process and the channel LEDs will display an animation of the interpolation. The six options include linear, exponential (ease in), logarithmic (ease out), sinusoidal (ease in/out), or two non-interpolated stepped modes. Step A works like the "stepped" mode from Frames, where the transition occurs at the halfway point between two keyframes. Step B applies the transition whenever a new keyframe become active.

VCA response. This setting controls the "feel" of the AMP knob (ranging from linear to exponential) and how the VCA responds to the interpolation curves. Press the VAR switch and then turn AMP to adjust the VCA response. The KEY LED will turn red during this process and the LEDs for all channels within the selection scope will display an animation of the VCA response. Unlike the six discrete interpolation types, the VCA response is more of a smooth crossfade between fully linear (turn left) and fully exponential (turn right). The range covers approximately 1.5 full rotations of the encoder.
Copy keyframes. This feature saves time when you want to set up various keyframes that modulate to/from a common baseline. Point the big knob to any existing keyframe (KEY LED turns green). Press the KEY switch for a few seconds until it turns red. You have copied the existing keyframe. Now turn the big knob to the timeline location where you want to create a new keyframe. Timeline locations with no existing keyframes are indicated by an orange KEY LED. Pasting into those locations will create a new keyframe. Timeline locations with existing keyframes are indicated by a red KEY LED. Pasting into these locations will overwrite an existing keyframe. If you want to exit the copy/paste mode without changing anything, press VAR to exit.
Randomize VCA levels. With the big knob pointing to an existing keyframe (KEY LED is green), press and hold the VAR switch for 3 seconds. The levels of all channels within the selection scope will be randomized. Repeat the process to randomize again.
Sequencing modes. Once you've set up your keyframes, there are three ways to move through the timeline. You can select one of these three options by pressing the SEL knobs for 3 seconds, then turning it. The KEY LED will start to blink, showing one of three colors to indicate the current mode. Green is the linear mode where keyframes can be smoothly interpolated by turning the big knob or patching external CV into the MOD input. Orange is the sequencing mode from Frames, where a trigger patched to the MOD input will step through keyframes without interpolation. When using this mode you can turn the big knob fully to the left to "reset" the sequence to the first step. Also be sure to turn the MOD attenuator up so that the trigger will be received. Red is the new random sequencing mode, which works like the orange mode but keyframes are selected randomly instead of sequentially. Once you've selected the mode you want, press the SEL encoder or the KEY switch to lock in your selection. Pressing VAR will exit without changing the mode.
Save presets. Press VAR and KEY for 3+ seconds. The KEY LED will start to blink green. This color indicates the SAVE mode. Release both switches once the LED starts to blink, then turn the SEL encoder to select one of the 12 preset slots (indicated by the channel LEDs). Press KEY to save the current keyframes, interpolation curves, and VCA response settings to the selected preset slot. Or press VAR to exit without saving.
Load presets. Nexus ships with 12 useful factory presets (not yet documented!) or you can also load presets that you've saved over the factory presets. Press VAR and KEY for 6+ seconds. The KEY LED will blink green after 3 seconds but will turn orange after 6 seconds. Release both switches while the LED is orange, then turn the SEL encoder to select one of the 12 preset slots (indicated by the channel LEDs). Press KEY to load the preset from that slot. Or press VAR to exit without loading, preserving your current keyframe config.
Delete all keyframes. If you want to quickly delete the current keyframe config, deleting all keyframes and returning all channels to their default interpolation/response settings, press VAR and KEY for 9+ seconds. The blinking KEY LED will cycle through green, then orange, then red. Release the switches once the LED turns red, then press KEY. This will delete all existing keyframes. All channels will be assigned the linear interpolation type and linear VCA response. This operation does NOT affect any presets—only the working state of the module.
Delete all presets. There is an additional operation that you can perform instead of just deleting the current keyframe config. After pressing VAR and KEY for 9+ seconds, the KEY LED will start to blink. Instead of pressing KEY to delete the current keyframe config, press the SEL knob once. All 12 of the channel LEDs will start to flash, indicating that all of your user presets are about to be replaced with the 12 factory presets. Press KEY to confirm the total annihilation of your carefully-crafted presets. Or press VAR to exit, keeping all of your presets intact.
Factory presets. Nexus ships with 12 factory presets to demonstrate some common patching applications. Saving a user preset into any of the 12 memory slots will overwrite the factory preset associated with that slot. However the factory presets can be restored using the "Delete all presets" operation described above.
- Preset 1: Null Preset. This preset contains no keyframes. Use this as a starting point or save a custom preset here to avoid overwriting any of the factory presets.
- Preset 2: Min/Max Fader. Smoothly morphs between two keyframes with minimum (left) and maximum (right) levels for all 12 channels.
- Preset 3: Internal Submix. Demonstrates how to self-patch unused VCA channels to control the volume of the ODD/EVEN mix outputs. Turn the knob to the left, then patch different audio signals into inputs 1/2 and 3/4. Signals 1/3 will appear at the ODD output and signals 2/4 will appear at the EVEN output. This creates a stereo mix, but changing the mix volume requires changing the individual VCA levels on Nexus or using an external mixer. However you can also patch the ODD output into input 11 and the EVEN output into input 12. Turning the knob to the right will increase the volume of the output mix. Now you can use outputs 11/12 as the final mix outputs, which are also now under voltage control, avoiding the need for external VCAs.
- Preset 4: Stereo Submix. A more complex all-channel fader which is intended for stereo patches. Five keyframes are arranged equally around the big knob. The first silences all channels. The second passes only the odd channels. The third passes only the even channels. The fourth passes all channels. The fifth fades out all channels.
- Preset 5: Six-Way Stereo Crossfader. Crossfades sequentially between all six stereo pairs, one pair at a time. The leftmost and rightmost keyframes silence all channels, allowing the first and last stereo pairs to be faded in/out.
- Preset 6: Alternating Stereo Crossfader. Crossfades between the top and bottom channels on alternating stereo pairs, facilitating simple stereo panning applications.
- Preset 7: Triple FX Send/Return. FX sends control the ratio of dry (unprocessed) audio and wet (processed) audio. This preset provides three identical stereo FX sends which utilize four keyframes. 1) Patch an audio source into input 1 (or inputs 1/2 if the source is stereo). Patch outputs 1/2 to a stereo FX processor. Patch the outputs of the FX processor back into Nexus inputs 3/4, then monitor the ODD/EVEN outputs and turn the big knob to the left. The leftmost keyframe mutes both the processed and unprocessed audio. The second keyframe amplifies the unprocessed audio, but mutes the audio returned by FX processor. The third keyframe mutes the unprocessed audio, allowing only the processed audio to be heard. The fourth keyframe fades the processed audio out to silence. The sweet spot is modulating between keyframes 2 and 3, which provides a simple dry/wet control. As you start patching the other inputs you can use Nexus to modulate the dry/wet ratio of three FX processors with just one knob, so that you can do parallel processing of multiple audio sources. The combined mix of all three processors will appear at the ODD/EVEN outputs of Nexus. Alternately you may perform serial processing and chain up to three FX processors by patching outputs 3/4 into inputs 5/6, then patching outputs 7/8 into inputs 9/10. With serial processing you could, for example, route a single audio source through a stereo delay, then a stereo filter, then a reverb.
- Preset 8: Quadraphonic Spatializer. Consists of four keyframes which route a signal to four different destinations. These could be four external modules or four different speakers. Patch the same signal into inputs 1 and 3. The signal will also be normalized to inputs 2 and 4. The four keyframes are arranged around the knob in correlation with the spatial orientation of a quadraphonic audio system (rear left, front left, front right, rear right). Channels 5-8 and 9-12 are set up identically to channels 1-4, so this form of panning can be repeated in triplicate.
Presets 9 and 10 are intended to be driven by an external trigger source or manually controlled with the big knob. See the "Sequencing modes" section above and choose the orange linear sequencing mode (or try the red random sequencing mode once you've understood how these presets operate). There is no "reset" function but you can use the big knob to jump to a certain step arbitrarily.
- Preset 9: Stereo 6-Step Sequential Switch. Steps through six keyframes which correlate with the six I/O pairs. The number of steps can be changed by adding or deleting keyframes.
- Preset 10: Triple 4-Step Sequential Switch. Steps through channels 1-4 in an exclusive way, creating a sequential switch. Outputs 1-4 would be patched to external modules, routing one or more input signal to different destinations. Two identical switches are accessible on channels 5-8 and 9-12. The concept of this preset could also be applied to create one or more sequential switches with an arbitrary number of steps. For example you could create six 2-step switches or two six-step switches.
Presets 11 and 12 are also intended to be driven by an external trigger source or manually controlled with the big knob. See the "Sequencing modes" section above and choose the orange linear sequencing mode. The 10V switch should also be turned on so that Nexus will generate CVs. Besides the clock source which is patched to the MOD input, nothing else should be patched into the module. There is no "reset" function but you can use the big knob to jump to a certain step arbitrarily.
- Preset 11: Arbitary Clock Divider. Each clock pulse steps through one of 12 keyframes. Because the interpolation mode is set to "stepped," keyframe changes will generate 10V pulses on the channel outputs whenever that channel alternates between a low state (VCA closed) and a high state (VCA open). Outputs 2, 3, 4, and 6 will therefore generate clock-divided gates as the MOD input is clocked. These divisions are arbitrary however, and you may use the same technique by creating new keyframes that correlate to arbitrary clock divisions up to 1/12 as needed. Turning the big knob all the way to the left will effectively reset the divisors.
- Preset 12: Six CV/Gate Sequencers. Each of the output pairs (i.e. 1/2) is used to generate a control voltage on the top row and a correlated trigger pulse on the bottom row. Each of the six output pairs has a different pulse pattern on the bottom row. Patch the top row outputs to oscillator pitch, filter cutoff, or other parameters on external modules. Patch the lower row outputs to external modules that expect a trigger input, such as envelopes. Also try randomizing the top row voltages on any keyframe. (Press the SEL knob to cycle through the channel selection scopes and choose the "rows" option, then turn the SEL knob to make sure the top row is active. With the big knob pointing to a keyframe, press the VAR switch to randomize all of the odd-numbered VCA levels on that keyframe, as described in the "Randomize VCA levels" section above). Turning the big knob all the way to the left will effectively return all sequences to their first step. Also try using the big knob to step through each keyframe manually instead of using this preset as a sequencer.
VCA calibration. When you move the module into a new case you may need to calibrate the VCAs. The module is calibrated at the factory but some modular power supplies put out slightly more or less than the optimal voltages. This will throw off the 0V baseline for the module. You may notice for example that the channel LEDs light up even when the VCA levels are set to zero, or that the channel outputs do not generate precisely 10V when the switch is enabled. This indicates that you need to perform calibration. To do this, power up the module with the VAR switch pressed, and make sure that none of the module's inputs (especially the MOD input) are patched. The KEY LED will blink green/red. The MOD input auto-calibrates itself immediately and this may be all that you need to do. Press either the VAR or KEY switch to save the calibration data and continue using the module as you normally would. But in some cases you may also want to recalibrate the individual VCAs. To do this, enable the 10V switch (up position) and measure the output of channel 1 using a multimeter or a module like the Mordax DATA. Turn the AMP knob until the multimeter reads as close to 10.000V as possible. Then turn the SEL knob to select another channel, patch that channel output into your multimeter, and repeat the process until all 12 channels are calibrated. Once the calibration is complete, press either VAR or KEY to save the calibration data and get back to patching.
LED brightness. Depending on the ambient light conditions you may want the 12 channel LEDS to be dimmer or brighter. Press the AMP knob for 3 seconds to change this. The KEY LED will flash red to indicate that this mode is active. Turn the AMP knob to choose from one of eight brightness levels, then press either the AMP knob or the KEY switch to save your preference. Pressing VAR will exit without changing the brightness.
Firmware update. Should firmware updates be required in the future, the process is documented here. Load the firmware WAV file into your computer or phone. Connect a 3.5mm patch cable between the device and the MOD input on Nexus. Turn the MOD attenuator fully to the right. Power up the module with the KEY switch pressed. The KEY LED will blink green. Begin playback of the firmware WAV file. During playback the KEY LED will blink more slowly and each of the successive channel LEDs will blink in sync with the KEY LED, moving from 1 to 12 as the update is received. The WAV file must be played back in its entirety for the update to succeed. If the update fails, the KEY LED will blink red. Don't worry, this won't harm the module, you just need to try again. Stop playing the WAV file, adjust the volume level of your device, then press KEY to start over. The WAV file must be played from the beginning each time, there is no such thing as a partial update. With wide variations in device volume outputs, it may take a few tries until the volume level of your device is matched to the level that Nexus expects. Once the update is complete, the module will restart and it will then be ready to use. Note that firmware updates will not overwrite your user presets, as they are stored in a separate part of the module's memory.
Downloads
Coming soon
MediaGrayscale Nexus Mutable Frames Audio Video Demos
Tag @grayscalemodular on Instagram with your videos and they can be embedded here.
